Using Git and GitHub via Graphical User Interfaces (GUI)#
Author: Liam J Berrisford (GitHub: liamjberrisford)
License: Creative Commons Attribution-ShareAlike 4.0 International license (CC BY-SA 4.0).
Overview#
This short course introduces Git and GitHub using graphical user interfaces (GUIs), with a specific focus on GitHub Desktop. It is designed for learners who prefer visual workflows or who are new to version control and want to avoid the command line.
The course is fully self-contained and does not assume prior experience with Git. Key terms and ideas, such as repositories, commits, branches, and pull requests, are introduced gradually and explained in plain language as they appear.
Rather than focusing only on which buttons to click, the course explains what each action represents conceptually, helping learners build understanding that transfers across tools and projects.
Course Objectives#
By the end of this short course, learners will be able to:
Explain the purpose of Git and GitHub in collaborative work
Describe key Git concepts using plain language
Use GitHub Desktop to clone a repository and make changes safely
Create commits and understand what they represent
Push changes to GitHub and open a pull request for review
Tools Used in This Course#
Primary Tool#
This course uses GitHub Desktop:
https://desktop.github.com/
GitHub Desktop provides a beginner-friendly interface that exposes Git concepts visually, making it well suited for learning.
Why GitHub Desktop?#
Why this tool is used in this course
GitHub Desktop is used as the reference tool for this course because it provides a clear, approachable interface that exposes core Git concepts without requiring prior command-line experience. Its layout makes it easy to see how files, commits, branches, and remote repositories relate to one another, which supports conceptual understanding rather than rote button-clicking.
Importantly, GitHub Desktop does not hide Git behaviour. Instead, it presents standard Git operations (such as commit, push, pull, and branch creation) in a visual form that maps closely to the underlying concepts.
Learners are encouraged to use any Git GUI they are comfortable with. The workflows demonstrated here apply equally to other tools, even if the interface and terminology differ slightly.
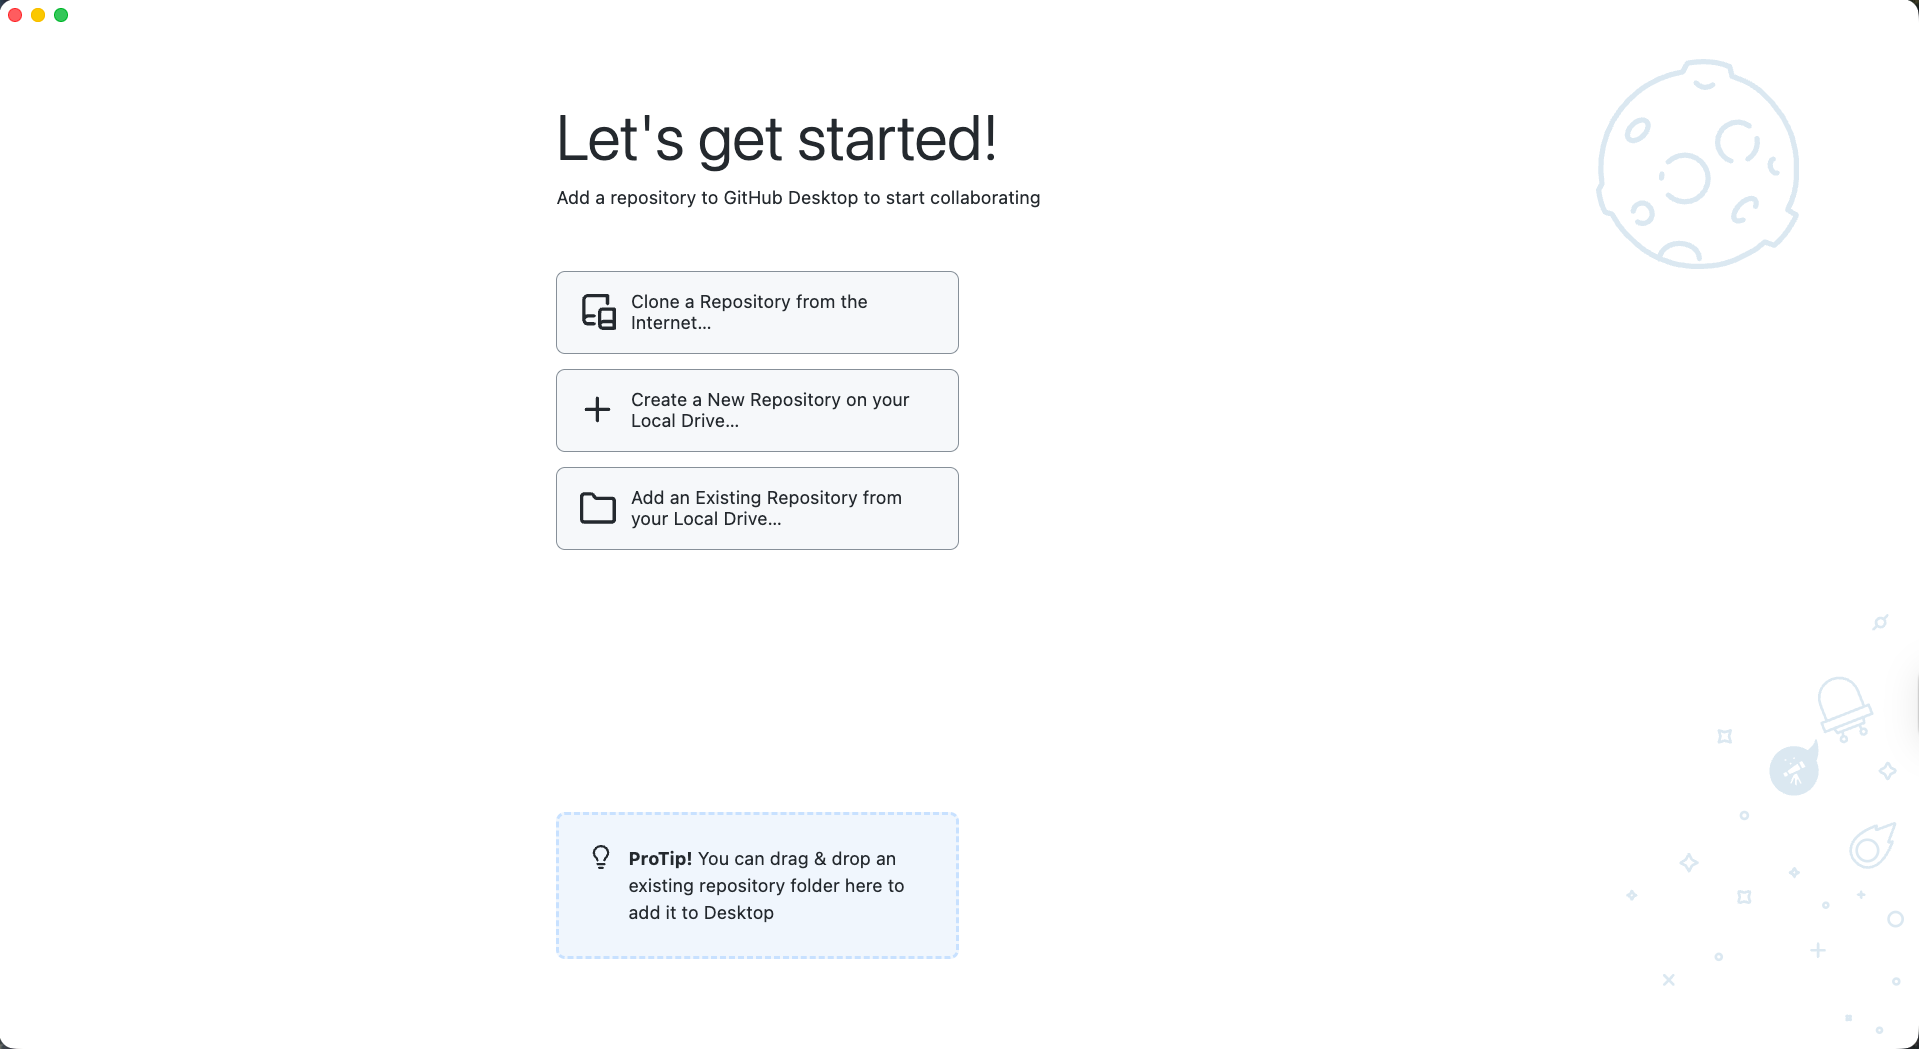
Fig. 6 Welcome screen within GitHub Desktop#
What Are Git and GitHub?#
What Is Git?#
Git is a version control system. It keeps track of changes made to files over time so that:
You can see what changed and when
You can undo mistakes
Multiple people can work on the same project without overwriting each other
Git works by recording snapshots of a project, called commits.
What Is GitHub?#
GitHub is an online platform that stores Git repositories and makes collaboration easier. It allows people to:
Share their work
Review changes made by others
Discuss updates before they are merged into a project
You can think of Git as the tool that tracks changes, and GitHub as the place where those changes are shared.
Core Concepts#
Repository#
A repository (often shortened to repo) is a folder that contains:
Project files
A complete history of changes made to those files
There are usually two copies of a repository:
A local repository on your computer
A remote repository hosted on GitHub
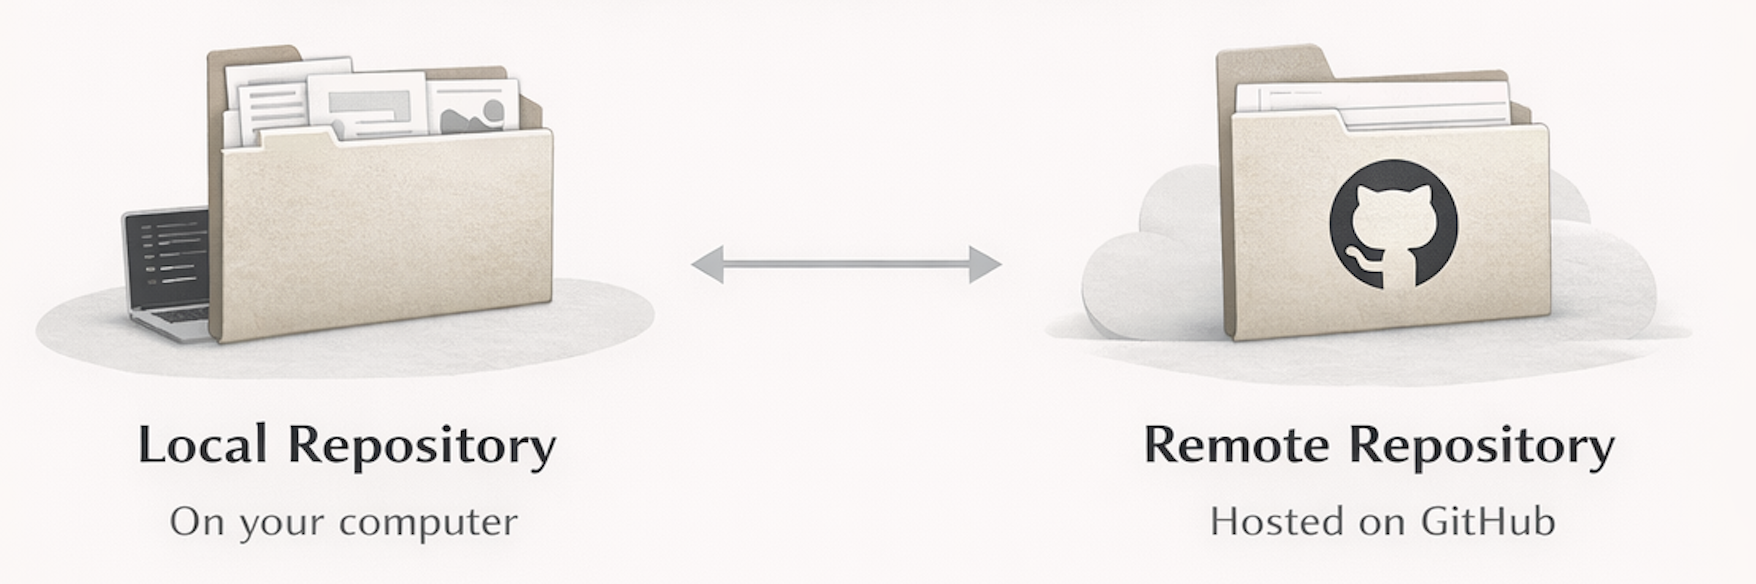
Fig. 7 Types of repository#
Commit#
A commit is a saved snapshot of changes.
Each commit:
Records what changed
Includes a short message explaining why the change was made
Commits form the history of a project.
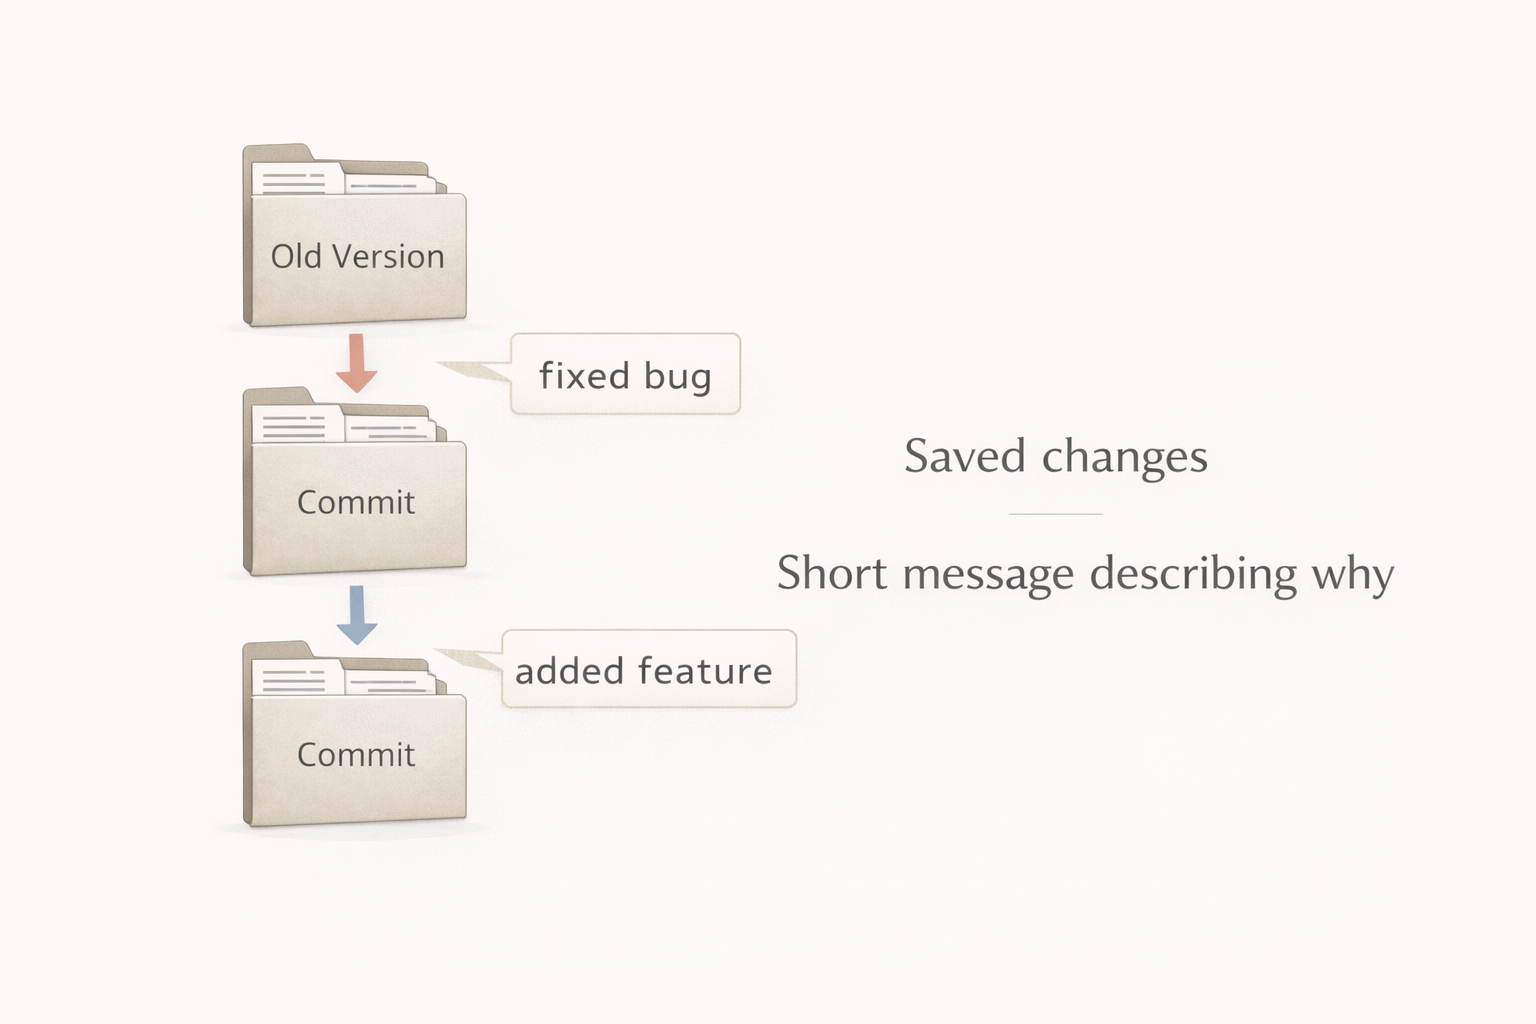
Fig. 8 Flow of commits to develop a project#
Branch#
A branch is a separate line of work.
Branches allow you to:
Experiment safely
Make changes without affecting the main version of the project
The default branch is often called main and represents the stable version of the project.

Fig. 9 The key branch main with a dev branch splitting off, which in turn has a feature branch#
Pull Request#
A pull request is a request to merge changes from one branch into another (usually into main).
Pull requests:
Make changes visible to others
Allow discussion and review
Help ensure quality before changes are merged
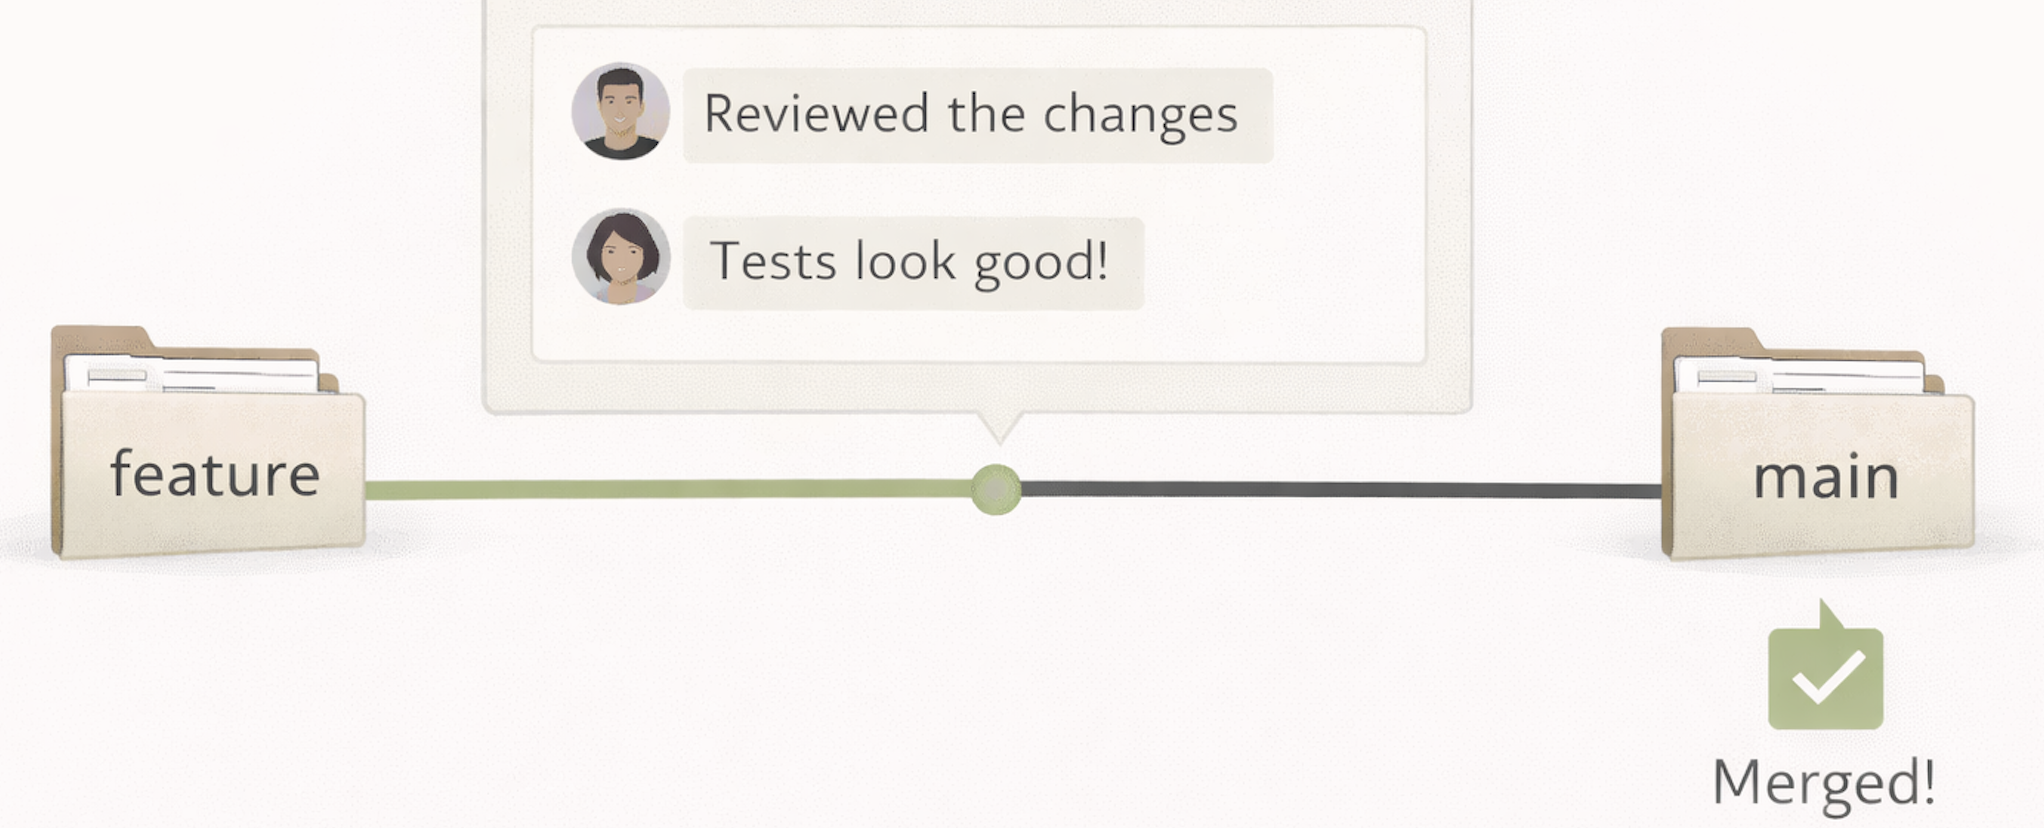
Fig. 10 A pull request to merge a feature branch into the main branch#
Installing and Logging into GitHub Desktop#
Downloading GitHub Desktop#
Download GitHub Desktop from:
https://desktop.github.com/
Follow the installer instructions for your operating system.
Logging In#
When you open GitHub Desktop for the first time:
Choose Sign in to GitHub.com
Complete authentication in your web browser
Authorise GitHub Desktop to access your account
This links the application to your GitHub account.
Accessing a Repository#
Before you can work with a project using GitHub Desktop, you need a way to access a repository. This can happen in two main ways:
Cloning an existing repository (most common when contributing to shared projects)
Creating a new repository (when starting a project from scratch)
Cloning a Repository#
Cloning creates a local copy of an existing repository on your computer. This allows you to view, edit, and experiment with the project files while keeping them connected to the original repository on GitHub.
Steps:
Open GitHub Desktop
Click Current Repository in the top-left corner
Select Add → Clone Repository…
Choose GitHub.com as the source
Search for your desired repo, for example
coding-for-reproducible-research/CfRR_Coursesif you wanted to clone the repo that hosts this course.Choose a local folder where the files will be stored
Click Clone
Once cloning is complete, the repository files will appear in the chosen folder on your computer.
Behind the scenes:
Cloning downloads the project files and the full history of changes, and links your local copy to the remote repository on GitHub. This connection allows you to later push changes and pull updates.
Creating a Repository#
Creating a repository is used when you are starting a new project rather than contributing to an existing one.
In most cases, repositories are created directly on GitHub first, and then cloned to your computer.
Typical steps:
Log in to GitHub in your web browser
Click New repository
Choose a repository name and visibility (public or private)
Optionally add a README file
Click Create repository
Once the repository exists on GitHub, you can clone it using GitHub Desktop following the steps above.
Why start on GitHub?
Creating the repository on GitHub first establishes a remote location for collaboration and backup, making it easier to connect local copies and work with others from the start.
Creating and Publishing a Branch#
Before making changes, create a new branch.
Steps:
Click Current Branch
Select New Branch
Give it a descriptive name (e.g.
course_dates_update)Click Create Branch
Click Publish Branch
Publishing the branch makes it visible on GitHub.
Making Changes Locally#
Navigate to the folder where the repository was cloned.
For example, you might edit:
CfRR_Courses/short_courses/gui_git_github.md
if you wanted to make changes to this page!
Make your changes and save the file.
Committing Changes#
After saving your changes, return to GitHub Desktop.
Steps:
Review the list of changed files
Enter a short commit title
Optionally add a description
Click Commit to
This records your changes as a new snapshot.
Pushing Changes to GitHub#
Your commit currently exists only on your computer.
Steps:
Click Push Origin
This uploads your changes to GitHub.
Opening a Pull Request#
To propose your changes:
Visit the webpage where you repo lives, in the case of this course it would be: https://github.com/coding-for-reproducible-research/CfRR_Courses
Select Pull Requests
Click New Pull Request
Set:
Base branch:
mainCompare branch: your branch
Click Create Pull Request
Add a clear title and description
Assigning a Reviewer#
Once you have opened a pull request, you can request that someone reviews your changes.
To assign a reviewer:
Locate the Assignees or Reviewers section on the right-hand side of the pull request page
Click the cog or edit icon
Search for the username of the person who should review your changes
Select their name from the list
Assigning a reviewer notifies them that your pull request is ready to be reviewed. They may provide feedback, request changes, or approve the pull request.
Once the pull request is approved and merged, any automated processes associated with the repository (such as website builds or tests) will run automatically.
Summary#
GitHub Desktop provides an accessible way to use version control while reinforcing core ideas such as commits, branches, and pull requests. By understanding why each step exists—not just how to click it—learners can collaborate confidently on shared projects.
Note
If you want to explore the concepts introduced here in more depth then you can take our Introduction to Version Control course.