Contributing to CfRR#
Why Contribute?#
The Coding for Reproducible Research (CfRR) training initiative has been a collaborative effort since the programme’s start; as such, we are always interested in collaborating with anyone who wants to help expand the available resources. By contributing, you can add to the existing content, help others, and potentially practice skills you have developed through CfRR training programs.
How Do I Contribute?#
There are a range of different ways for you to engage with the CfRR training programme depending on the skillset you currently have, and the skillset you want to develop. There are three key ways in which you can engage with the CfRR training program, including (1) becoming a helper within workshops and helping to deliver training workshops to individuals across the university, (2) identify and highlight issues with the current material on the website, or (3) create and contribute your own course to the CfRR program. Each of these different methods of contributing to the programme are discussed in more depth below.
Become a helper#
When a workshop is delivered through the CfRR programme, it typically involves a workshop leader, who is responsible for presenting the content, leading participants through live coding examples, and managing the overall flow of the session. They are supported by one or more workshop helpers, who play a vital role in ensuring participants stay on track by answering questions and offering real-time support throughout the workshop.
For more information on the different ways you can get involved, see the Roles page.
If you have experience in some of the offered content and would be interested in becoming a course helper, please get in touch with the team at our email address: codingforreproducibleresearch@exeter.ac.uk or fill out the form here.
Highlighting Issues#
If you would like to contribute to the programme but don’t have the time to become a helper or develop course content, auditing the course materials is an excellent way to refresh your understanding of content and help improve the CfRR program. While due care is taken to ensure that the programme’s material is accurate and up to date, mistakes do happen, and some of the content on the website may be incorrect. It might also be the case that you think there is a better way to explain a concept or add additional context to part of a course. We want to make the CfRR content the best possible, so it’s better to raise any queries and verify the materials, even if you are unsure if the content needs changing. We are a very friendly bunch, so we are more than happy to have feedback on the programme.
Types of Issue#
Some of the potential things that could be highlighted include:
Typographical Errors: Misspelling, incorrect punctuation, grammatical error and spacing issues etc.
Factual Errors: Incorrect scientific or mathematical data, misstated principles, incorrect citation or attribution etc.
Content Clarity and Comprehension: Ambiguous statements, poorly explained concepts, jargon not explained etc.
Formatting and Layout Issues: Inconsistent font usage, poor image quality, mismatched or misaligned elements etc.
Technical Errors: Broken links, non-functional interactive elements, issues with embedded media, accessibility issues (e.g. lack of alt text for images) etc.
Cultural and Bias Concerns: Content that may be culturally insensitive or offensive, gender or racial biases, stereotyping, lack of inclusivity etc.
Outdated Content: Information not reflecting the latest research or developments, old statistics or data, references to outdated technologies or practices etc.
Logical Fallacies or Reasoning Errors: Oversimplification, hasty generalizations, contradictions or inconsistencies in content etc.
The above list is meant to provide some examples, but is not meant to be exhaustive. If you find an issue that is not on the list please do still raise it, and we can add that type of issue to the list!
Creating a GitHub Issue#
If while going through the content of the website you notice that there is an error, the way to let us know is to raise a GitHub Issue. You are able to do this easily from the website - simply click the GitHub Icon in the top right of the page where the issue is, and click Open Issue, as shown below.
GitHub Issue Button#
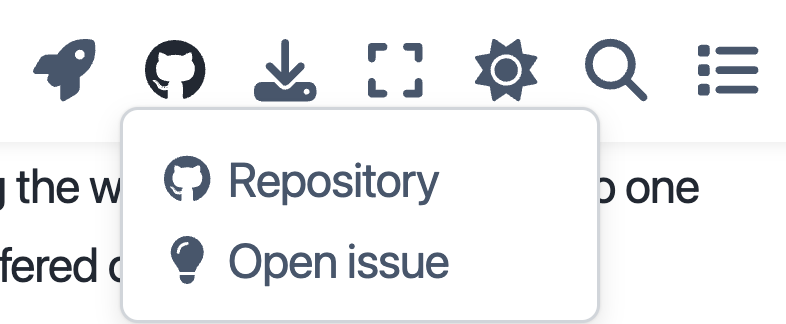
Fig. 11 A flowchart depicting an “Agile Software Development Methodology.” The process starts with “Requirements Gathering,” leads to “Design,” then a cyclical “Implementation” and “Testing” phase, with a feedback loop from “Testing” back to “Design” for “review progress & reflect on requirements.” Finally, the process moves to “Deployment” and “Maintenance” in a linear fashion.#
Once you have clicked the button, a new tab will open taking you into a ready-made GitHub Issue form that you can then add content to explain the issue in more depth. The button will automatically populate the title with the page that the issue is on - please leave that in the title as it makes it easier for whoever fixes the issue to find the issue being discussed.
The two primary elements that are needed to raise a GitHub Issue are:
Title: The title should briefly cover what the issue with the website content is.
Main Body: The main body of the issue should provide enough context so that anyone can understand the issue and contribute the fix to the problem.
Alongside the two main elements, if desired, it is also possible for you to include a label for the issue that will help contributors to know what sort of issue is being raised and assign it to the correct individual. However, this can be done by the central CfRR team so feel free to leave it blank.
Once you are happy with the content of the issue, then click Submit new issue.
At this stage the issue will then be added to the GitHub repository and the central CfRR team will be able to see the issue, triage it and put into motion the needed elements to fix the issue.
As an example issue, we raised the problem that when discussing the process of highlighting issues in this exact webpage, no example issues were given, which could be confusing for an individual who had never audited educational material before. As such, we raised the issue and then a subsequent fix could be implemented, in this case we added an example to the webpage. A screenshot of the webpage with the implemented solution can be seen below, with the link to the webpage of the now closed issue which can be found here: Highlight Issues Example Issue
Github Issue Example#
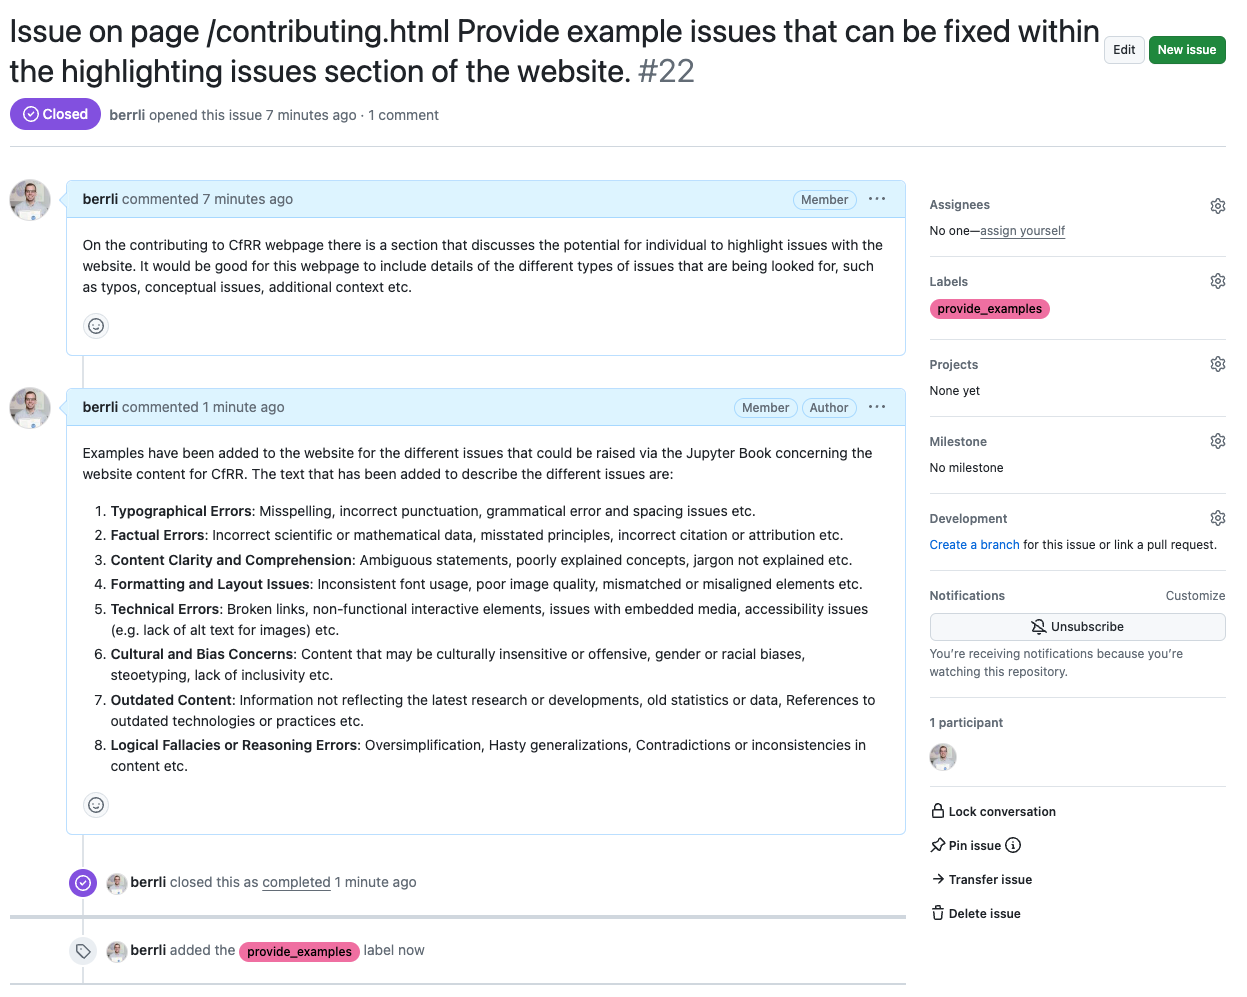
Fig. 12 A screenshot of a GitHub webpage focusing on an issue titled “Issue on page /contributing.html Provide example issues that can be fixed within the highlighting issues section of the website. #22”. The issue, which is closed, displays comments from user “berrli” outlining the purpose of the issue and providing a detailed numbered list of various types of errors that could be included as examples. The right sidebar shows issue details like assignees, labels (“provide_examples” is present), projects, milestone, and notification options.#
Making Changes#
The final way to contribute to the CfRR program is to make changes to the content of CfRR yourself. We request that you make use of branches of the central CfRR repository to do this. The steps you will need to follow are below, but if you are struggling with them, it might be worthwhile to refer to the Introduction to Version Control with Git and GitHub course delivered within the CfRR program.
Clone the Central Repository#
Access Original Repository: Navigate to the CfRR repository, found here: https://github.com/coding-for-reproducible-research/CfRR_Courses/tree/main
Clone the Repository: Click on the
Codebutton, copy the URL, and run the following command within your terminal to clone the repository to your local machine:git clone https://github.com/coding-for-reproducible-research/CfRR_Courses.git
Create and Use a New Branch#
Navigate to Repository Directory: On your local machine, navigate to the repository directory that has just been downloaded, achieved with:
cd CfRR_CoursesCreate a New Branch: Create a new branch for the changes you want to make within the repository, achieved with
git checkout -b your-branch-nameMake Changes: Make the necessary changes to the content, such as fixing issues, adding a new course, etc.
Stage your changes: Add the files you have changed to the staging area; this can be done for the file
example.txtwith the commandgit add example.txtCommit your changes: Commit the changes to the branch with the following command:
git commit -m "Description of the changes you made"Push your changes: Push the changes that have been made to your branch on GitHub with the following command:
git push origin your-branch-name
Contribute back to the Main CfRR Branch#
Github Repository: Navigate to the repository on GitHub where you pushed the branch.
Create a Pull Request: At the top of the GitHub page, you should see a prompt to create a pull request for the branch you pushed; click on
Compare and Pull Request. If you don’t see this, try switching from the branch you are currently on to the branch you have created.Complete Pull Request Form: Provide both a title and a description for the pull request.
Select the base repository and branch: Ensure that the base repository is set to the original repository and the base branch is the branch you want to merge into (
mainfor CfRR_Courses).Submit the Pull Request: Click on
Create Pull Requestto submit the pull request and allow us, the central CfRR team, to integrate the changes into the main materials.
Pull Request Banner#
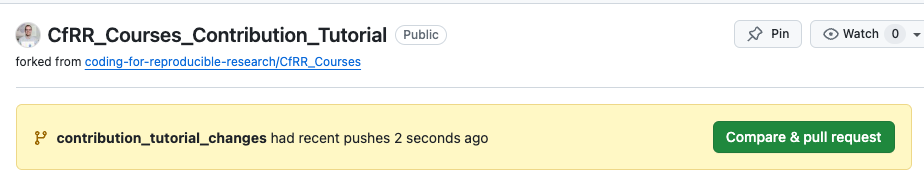
Fig. 13 A screenshot of a GitHub page showing a banner at the top. The banner displays the repository name “CfRR_Courses_Contribution_Tutorial” (marked as “Public”), which is forked from “coding-for-reproducible-research/CfRR_Courses.” Below this, a yellow box highlights that the “contribution_tutorial_changes” branch “had recent pushes 2 seconds ago” and offers a green button to “Compare & pull request.”#
Pull Request Form#
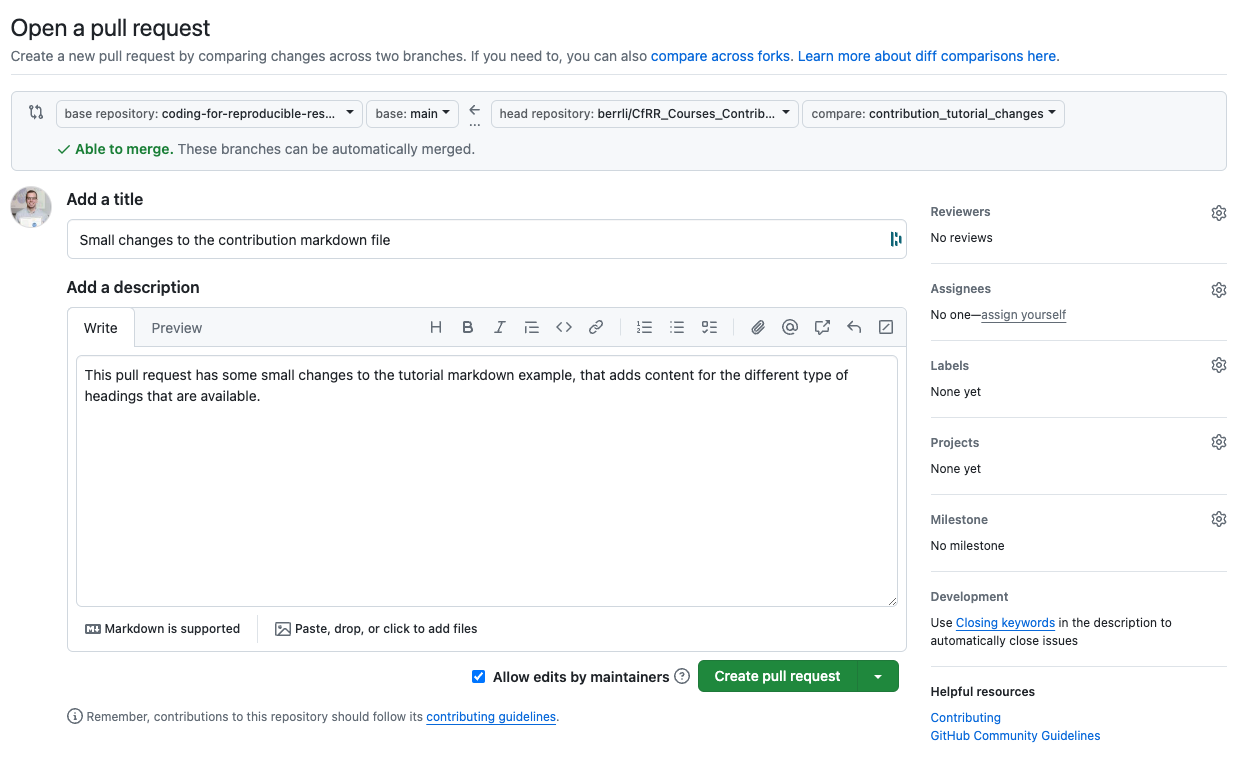
Fig. 14 A screenshot of a GitHub webpage displaying a form to “Open a pull request.” The form specifies the base repository (“coding-for-reproducible-research/…”) and the head repository (“berrli/CfRR_Courses_Contribution_Tutorial”) with their respective branches. A green message “Able to merge. These branches can be automatically merged.” is displayed. The form allows for adding a title, such as “Small changes to the contribution markdown file,” and a description with rich text editing options. Below the description, an option “Allow edits by maintainers” is checked, and a “Create pull request” button is present. On the right, sections for “Reviewers,” “Assignees,” “Labels,” “Projects,” and “Milestone” are visible.#
Testing Changes#
Jupyter Lab#
We recommend using JupyterLab for making changes to the content via the markdown (.md) and jupyter notebooks (.ipynb). JupyterLab is an open-source web-based interactive development environment (IDE) for notebooks, code, and data. It provides a flexible and powerful interface for data science, scientific computing, and machine learning projects. JupyterLab is an evolution of the classic Jupyter Notebook, offering a more integrated and versatile user experience.
You can install JupyterLab via Conda or Pip. Below are the steps for each method.
pip:
pip install jupyterlabconda:
conda install -c conda-forge jupyterlab
Jupyter Book#
Once you have made the changes you wish to the content via the markdown (.md) and jupyter notebooks (.ipynb), then it is a good idea to check the changes that have been made to the Jupyter Book. The process for conducting this is:
Install Jupyter Book: Install the jupyter book package either via
conda install -c conda-forge jupyter-bookorpip install jupyter-book.Clean Any Temporary Files: Running the command
jb clean .will clean up any build files and temporary files generated by Jupyter Book in the current directory.Build Jupyter Book: Running the command
jb build .will build a Jupyter Book from the source files located in the current directory. This will then convert the source materials, the.mdand.ipynbfiles into a static website that you can then view in a web browser. The root html page will be located inCfRR_Courses/_build/html/index.html.
It is a good idea to build and view a local copy of the website that you have built before opening a pull request to merge your chains into the main branch of the GitHub repository.
Two key files to be aware of are:
_toc.yml: This file defines the structure and table of contents for the Jupyter Book, specifying the order and hierarchy of chapters and sections.
_config.yml: This file contains configuration settings for the Jupyter Book, including theme options, title, author, and other global settings.
If you wish to add a new page to the website, e.g. you have created a new .md or .ipynb file, then you will need to add the file to the _toc.yml file.
The Jupyter Book Website, available here, details all of the additional functionality of Jupyter Book that may be of interest.